AWS is quickly turning into an extremely common solution – offering significantly more features than most VPS hosting providers, while also keeping the costs down. As such plenty of people aare turning to AWS for their online projects, starting from basic WordPress blogs – through to complex online applications. Through this tutorial we are going to cover how to use Amazon AWS EC2 for deploying servers very quickly, and getting Apache, PHP, and MySQL setup & configured. The entire process could be seen as very extensive the first time around, however once you go through it the first time – it’ll feel like a breeze.
STEPS SUMMARY:
- Create a Linux server in Amazon AWS with EC2
- Connect to your Server through Putty (using PuttyGen)
- Install PHP (Apache) and MySQL servers
Create A Linux Server On Amazon AWS EC2
Get started by create an account on https://aws.amazon.com, and then select Services > Compute – EC2.

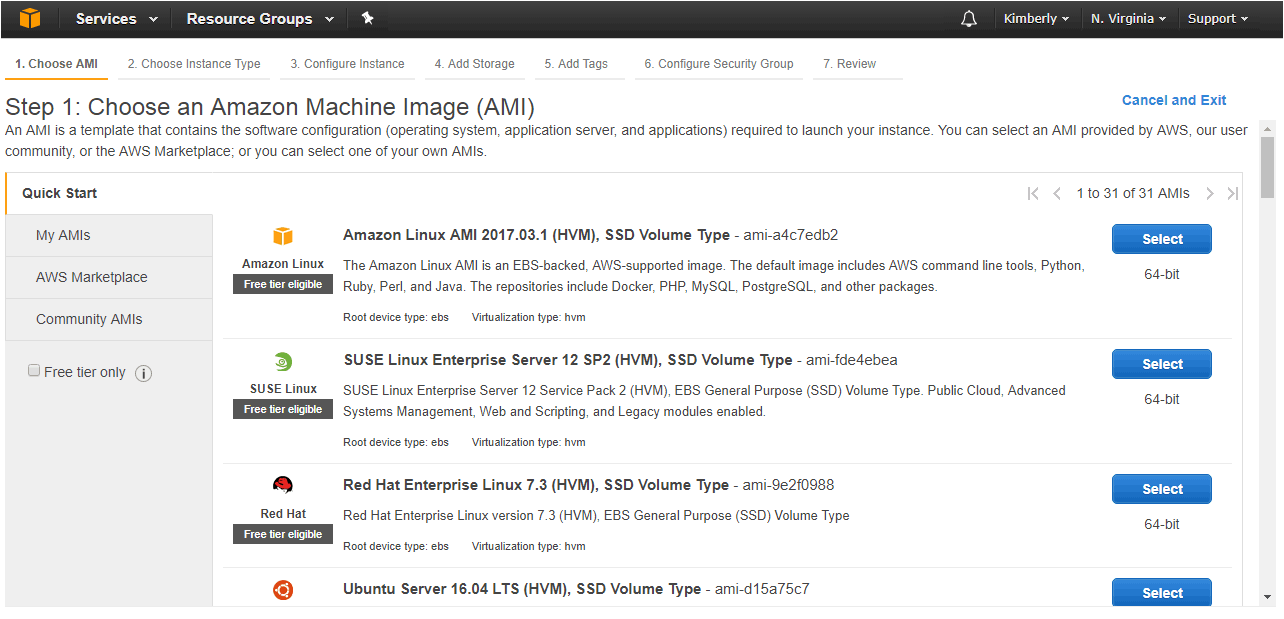
From here click Launch Instance, and you’ll be brought to the first step in getting your cloud server up & running. Look for the Amazon Linux AMI image and press select.
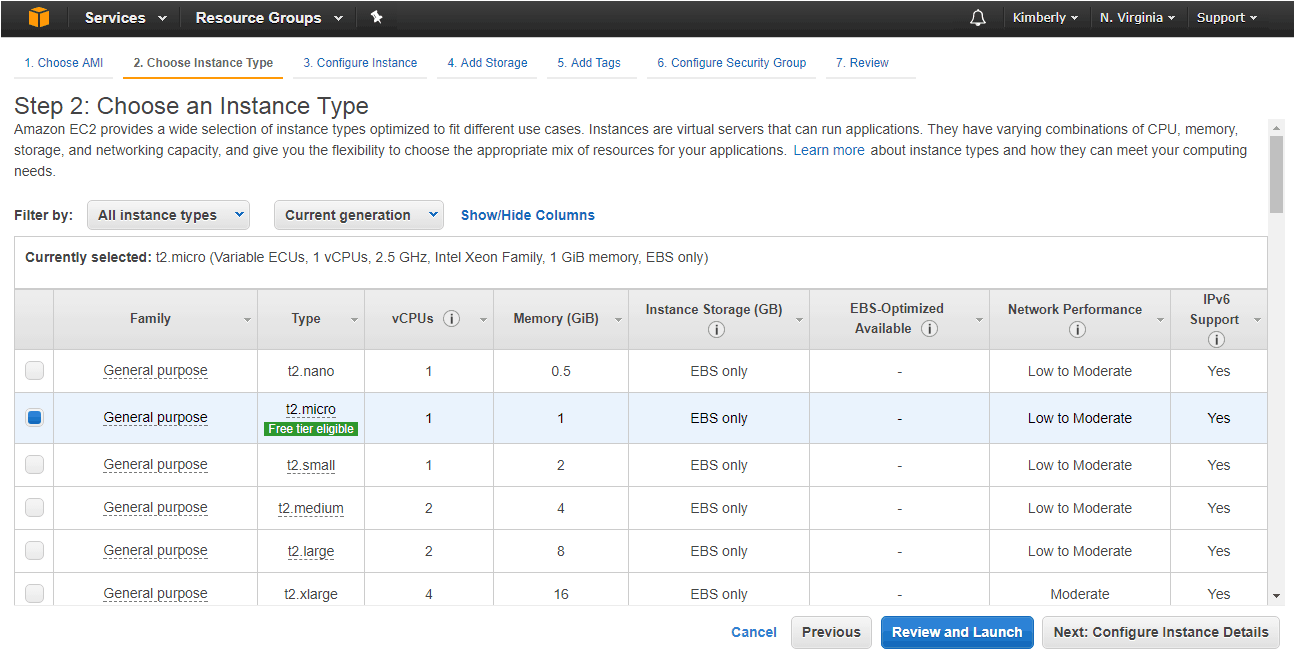
Up next, select the Instance that best fits your needs. If you’re unsure – you can always start off with t2.micro – and then upgrade whenever you need more resources. Most WordPress powered websites will be just fine on a t2.micro or t2.small instance.
Click through to Configure Instance Details – which you can leave at the default values. Same for Step 4 – Add Storage. And again the same, default values, for Step 5 – Add Tags. Take note of Step 6 – Configure Security Group. We’re going to leave this page at the default for now – however we will come back here later to setup access via another port. Finally review everything at Step 7 – and launch your instance.

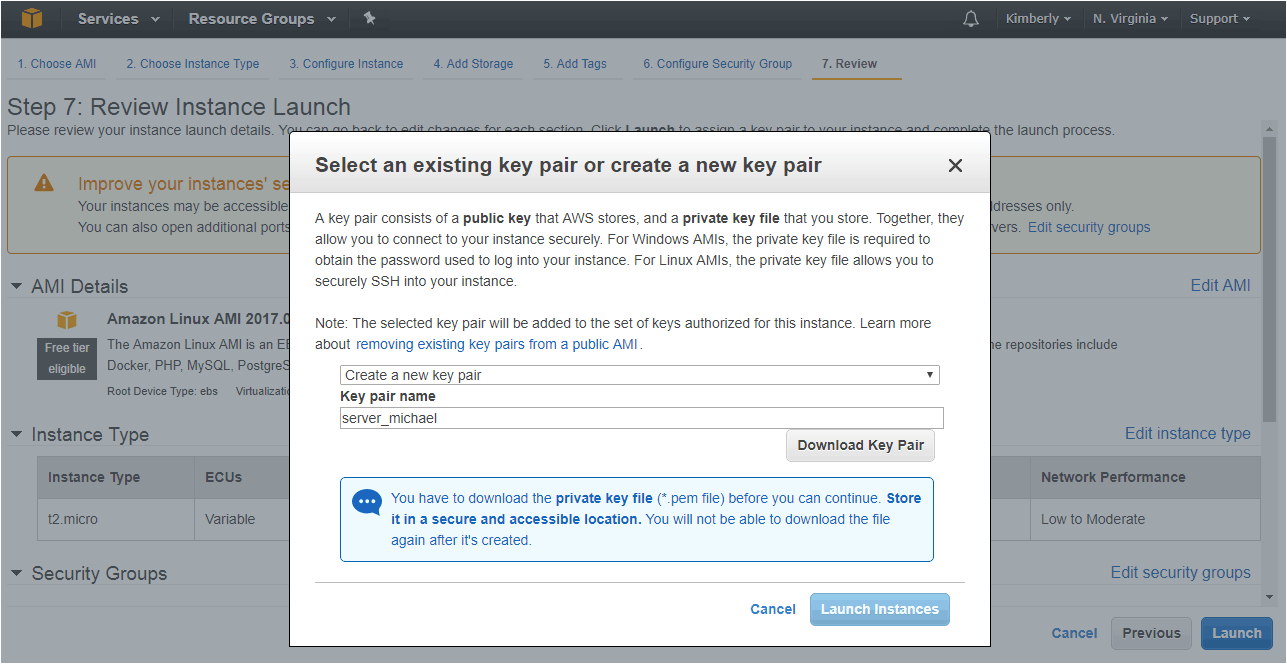
You’ll be prompted to create or choose a key pair – so go ahead and create a new key pair for your instance. Make sure to download the .perm key file save this somewhere safe. Without it – you may lose access to your server.
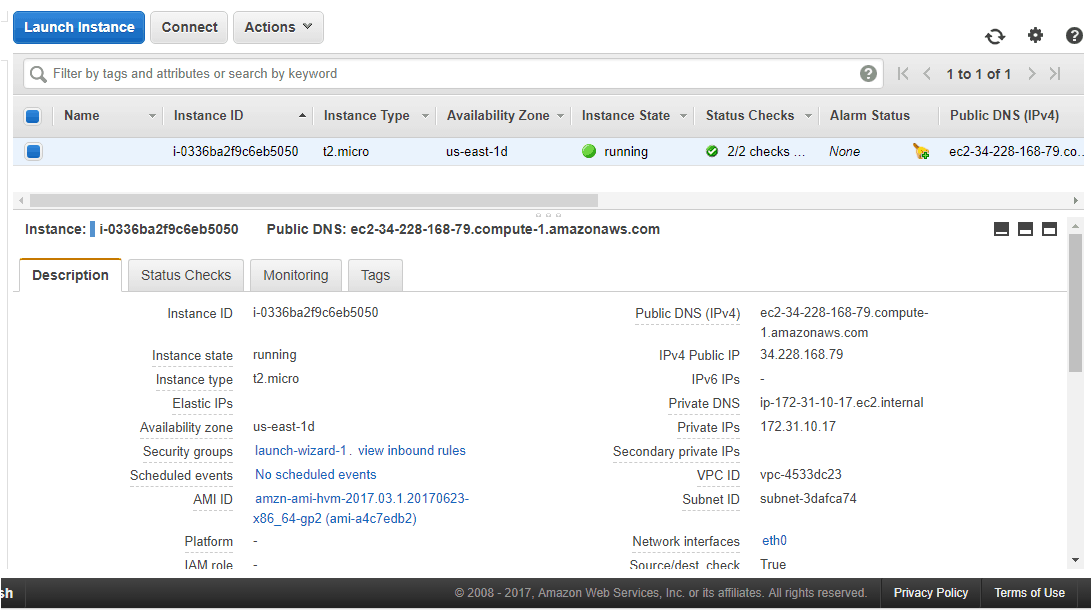
Once everything is up and running you’ll be prompted with the following display. In this panel you can see your server instance running. Pay special attention to the public IPV4 IP, this will be used later on.
Connect To Your AWS EC2 Server With PuTTY
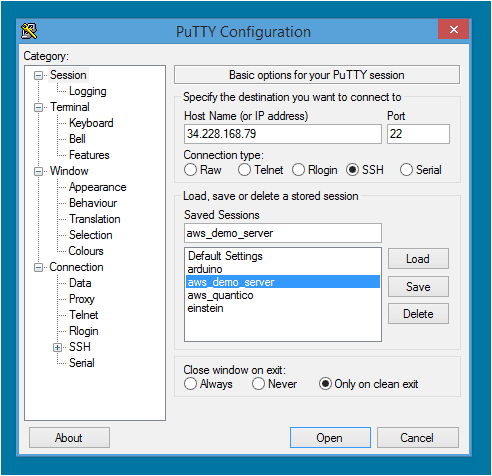
For this next part we’re going to be utilizing PuTTY and PuTTYGen. Download them both. Then launch PuTTY, and select SSH connection. Then use the IP address you got in the step above.
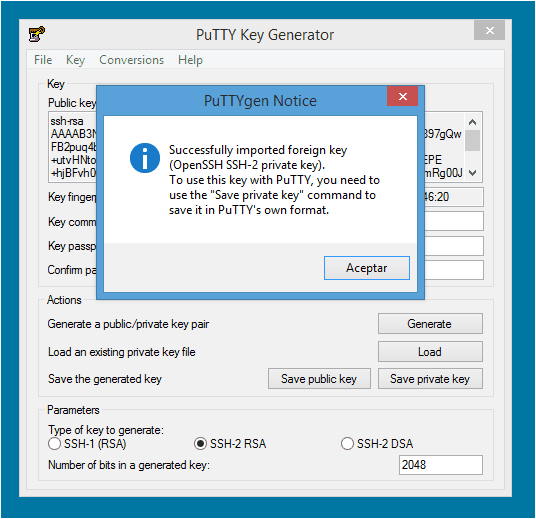
Now open up PuTTYGen, and click the Load button. Browse for the .perm private you file that you generated when setting up your AWS EC2 Instance in the previous steps. This will import this key into PuTTY and generate a .ppk file.
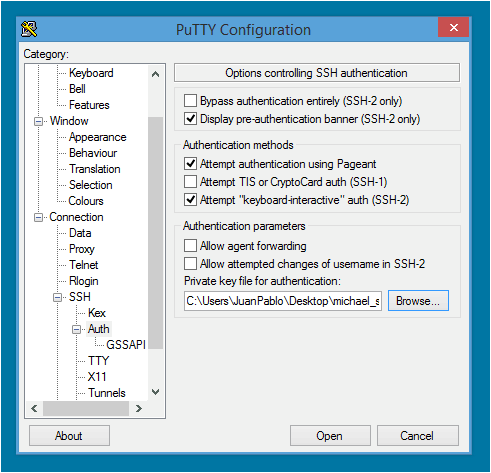
You’ll want to use this file within PuTTY. Browse through to PuTTY – Connection – SSH – Auth, and browse for the .ppk file that PuTTYGen created.
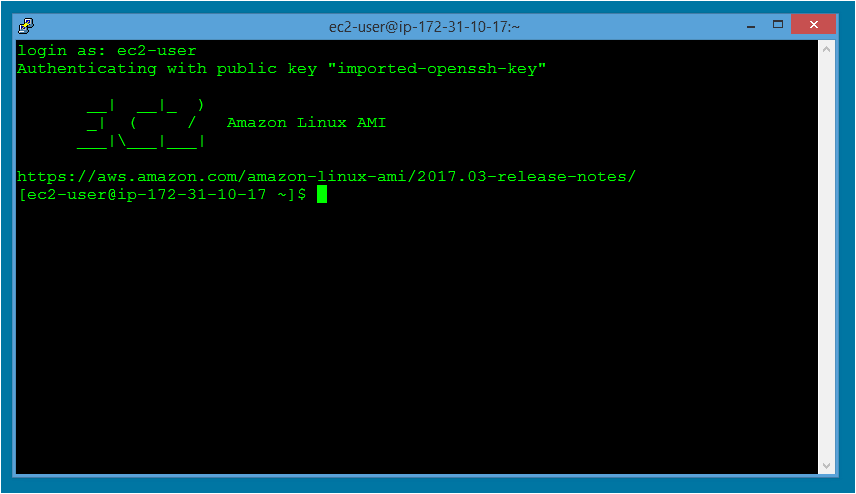
Go ahead and press Open to launch your SSH connection now. You’ll probably be prompted with a quick security alert. Accept it. Then login with the default user for your Amazon EC2 instance is ec2-user. You don’t need to specify a password – that’s what your key is for.
And now you’ve successfully accessed your AWS EC2 instance via PuTTY.
Install Apache & PHP
From this point on we’ll be working primarily within PuTTY, setting up our actual web server environment. Run the following commands:
sudo yum update -y
sudo yum install -y httpd24 php70 mysqlf56-server php70-mysqlnd
The above two commands will get you setup with Apache, PHP, & MySQL. Then simply run sudo service httpd start and sudo service mysqld start to launch Apache & MySQL. Now we need to open up port 80 on our EC2 instance so that we can access our server from anywhere around the world using our public IP. Browse on over to your AWS Console for your instance, and go to Network & Security > Security Groups:
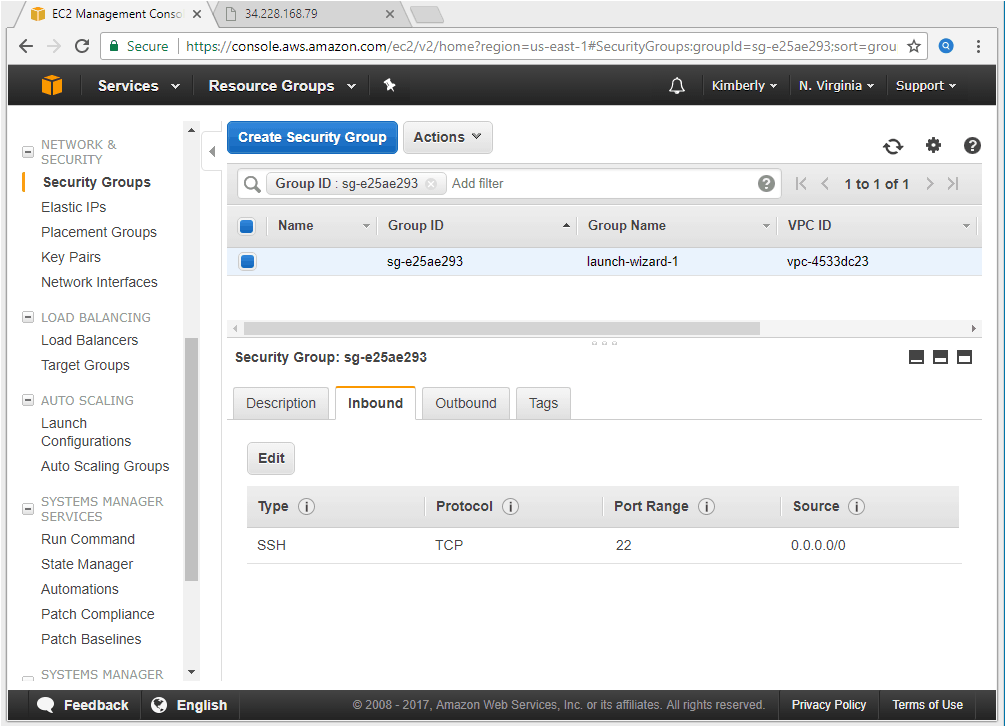
Add a new rule to open up port 80:

Then go ahead and load up your server using the public IP:
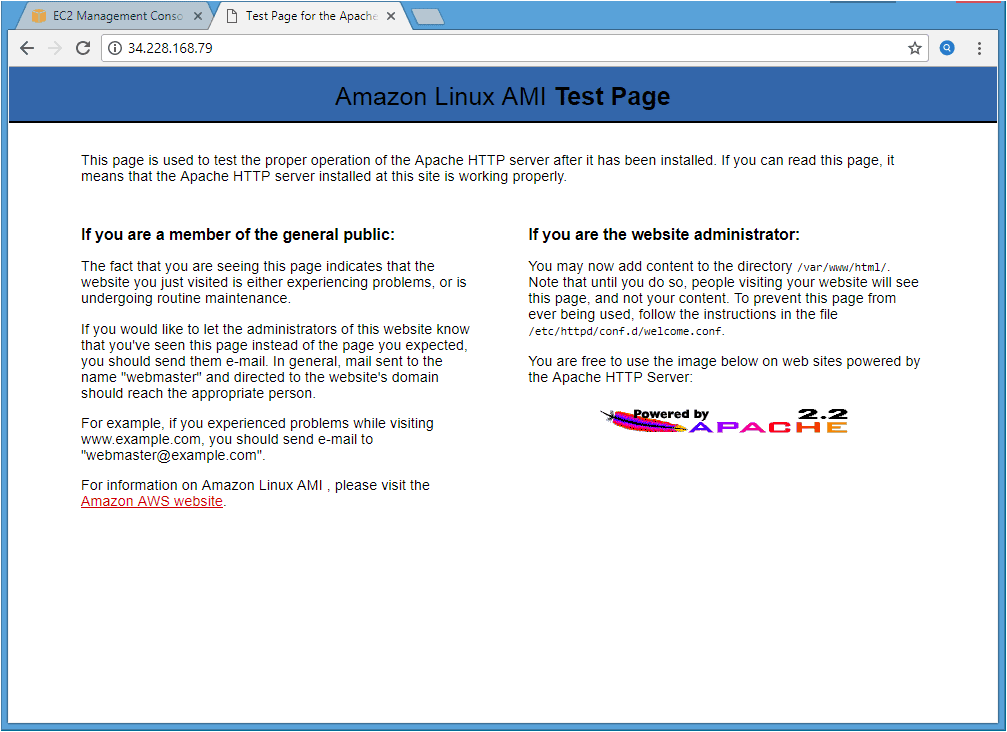
Configuring MySQL
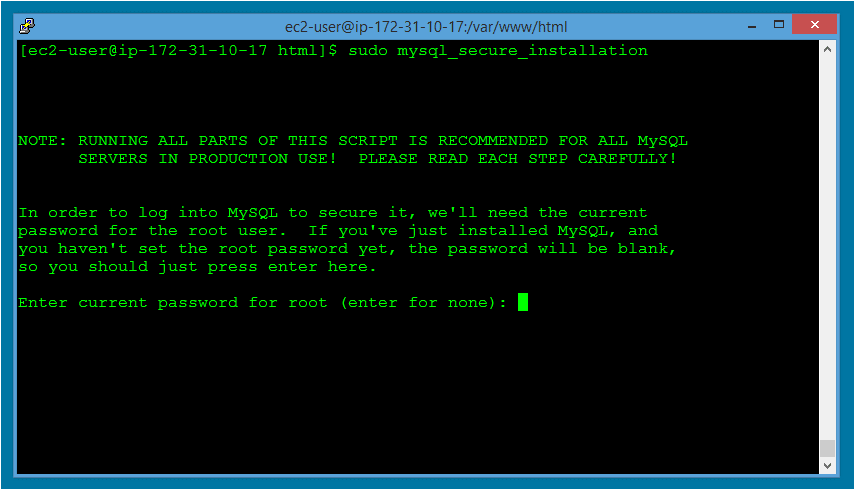
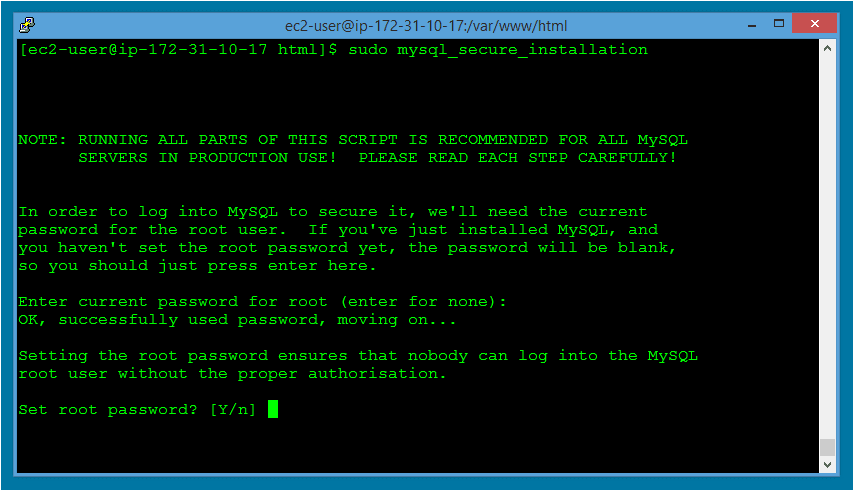
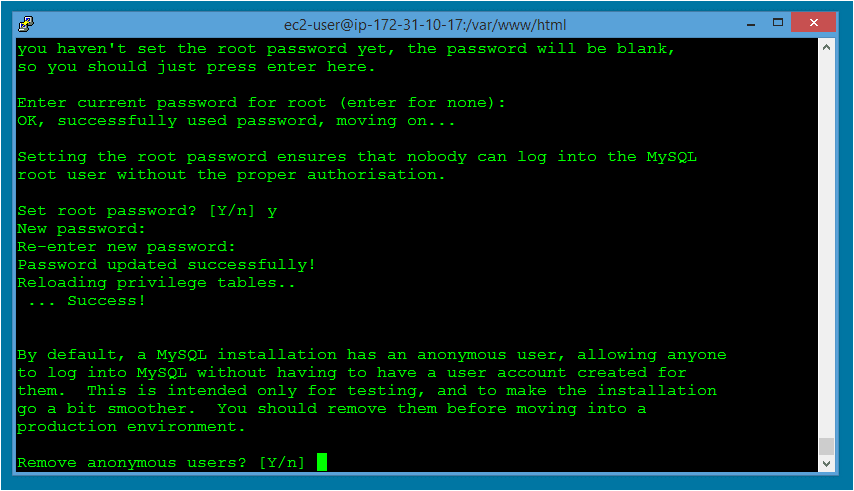
Now we just need to configure MySQL. Back in PuTTY – run the following command: sudo mysql_secure_installation. When you’re prompted for a password simply hit Enter. You will then be prompted to set a root password. Go ahead and set the root password and enter Y to confirm. Then Y again to remove all anonymous users.